Saturday 26 March 2016

Top 10 Must-Haves : sleepingwithmakeup x illiyaridzuan

Hi everyone, today's post is going to be a collaboration with fellow makeup/beauty curator, @illiyaridzuan who is my go-to gal for when I want to read about a different branch of makeup, because I think she reaches out for brands and products that I don't normally go for and it is so interesting to read what she likes and what's out there. So. Having said that, I've decided to approach her to write about our Top 10 Must-Haves so all of you can get a lot of perspectives and variety of products since our taste and approach are very different from one another. So, make sure you check out her Instagram account, @illiyaridzuan where she will be talking about her favourites! Let's get started!

1. Peter Thomas Roth Gentle Foaming Cleanser


Game-changer!! This is what I'm calling it now. If you're an architecture student, or doing medicine - or anything that involves late-nights and long hours, you need this. It instantly cleanses away the grime that is on my face after a long day at the studio, and leaves my skin feeling fresh and squeaky clean. The best part is, this cleanser is sulfate-free, fragrance-free, alcohol-free and soap-free which is suitable and gentle enough for my dry, sensitive skin. It combats any dirt from clogging up my pores and cleans away build-up which causes acne/break-outs. I really like how it makes my skin looks substantially brighter and just really clean, overall. I have repurchased this time and time again and it is the best cleanser for my skin. If you want an extensive review, I will link the post below. Love this.

2. iS Clinical Active Serum


This is my break-out solution. I use this every single day on areas that I am already breaking out or on areas where I can see spots tryna show! This serum helps in softening and smoothing out skin, reduces fine lines, and diminishing pores and hyper pigmentation. It is essentially a chemical exfoliant, and I'd use this twice a day on spots. Usually, I am an ingredient snob but for this serum, I am willing to overlook the slight problem in this product's ingredient deck (it has alcohol in it). Hence I only apply this on problematic areas, and not using it for the whole face (as recommended). This serum works so well on my skin and fight my breakouts like no other and I pack this with me everywhere if I am travelling. This is one of my essentials for a smooth, even skin and it lasts forever since I use less than a drop for spot-treating my skin.

3. REN Evercalm Global Protection Day Cream


If you have sensitive skin like mine, you must've experienced stinging on the skin when using a harsh moisturiser or anything that contains fragrance. I had such bad luck with finding the right moisturiser that won't agitate the redness in my skin and with ingredients that is gentle enough in a cream. The REN Evercalm Global Protection Day Cream is such a great moisturiser for delicate skin and since it works as an anti-aging cream as well, it definitely does the trick in hydrating my poor, parched dry skin! I really love how clean the ingredient deck is in this moisturiser - REN Skincare is well-known for the best blends of high-grade formulas and ingredients. I love that this formula soothes and calms my skin - this is definitely a must-have for me. 

4. RMK Eyelash Curler 


I cannot go anywhere without at least curling my lashes. The RMK eyelash curler is like Shu Uemura's cooler sister. It has just enough crimp without making my lashes look too dolly-eyed, you know what I mean? So, that makes my daily looks have that underdressed, understated edge to it. The grip is also moderate - not too strong, and not too soft so my lashes don't feel like they're about to fall off whenever I curl them! I really like this RMK eyelash curler for daily use however I do save the Shu Uemura's for special days.

5. Burberry Light Glow Natural Blush in Earthy Blush No.07 


In the mornings, I do get extra extra puffy and swollen in the face (especially around the eyes) and I just look super bloated so this is where Earthy No.07 comes in. The muted taupe, borderline peachy blush just gives a beautiful hint of definition wherever I need it. I use this as a contour/blush, as a transition shade, I also dust this all over my temples and forehead. Basically everywhere. The brush is not crappy either. It's in my purse for when I feel washed out and I just need a boost of colour to perk up my face. Honestly I didn't know I would like Earthy No.07 as much as I do, but I am an avid fan of neutral understated looks so Earthy No.07 has everything I need in a beautiful  compact. Earthy No.07 is the Hermione Granger of makeup - it does everything, and it does more! 

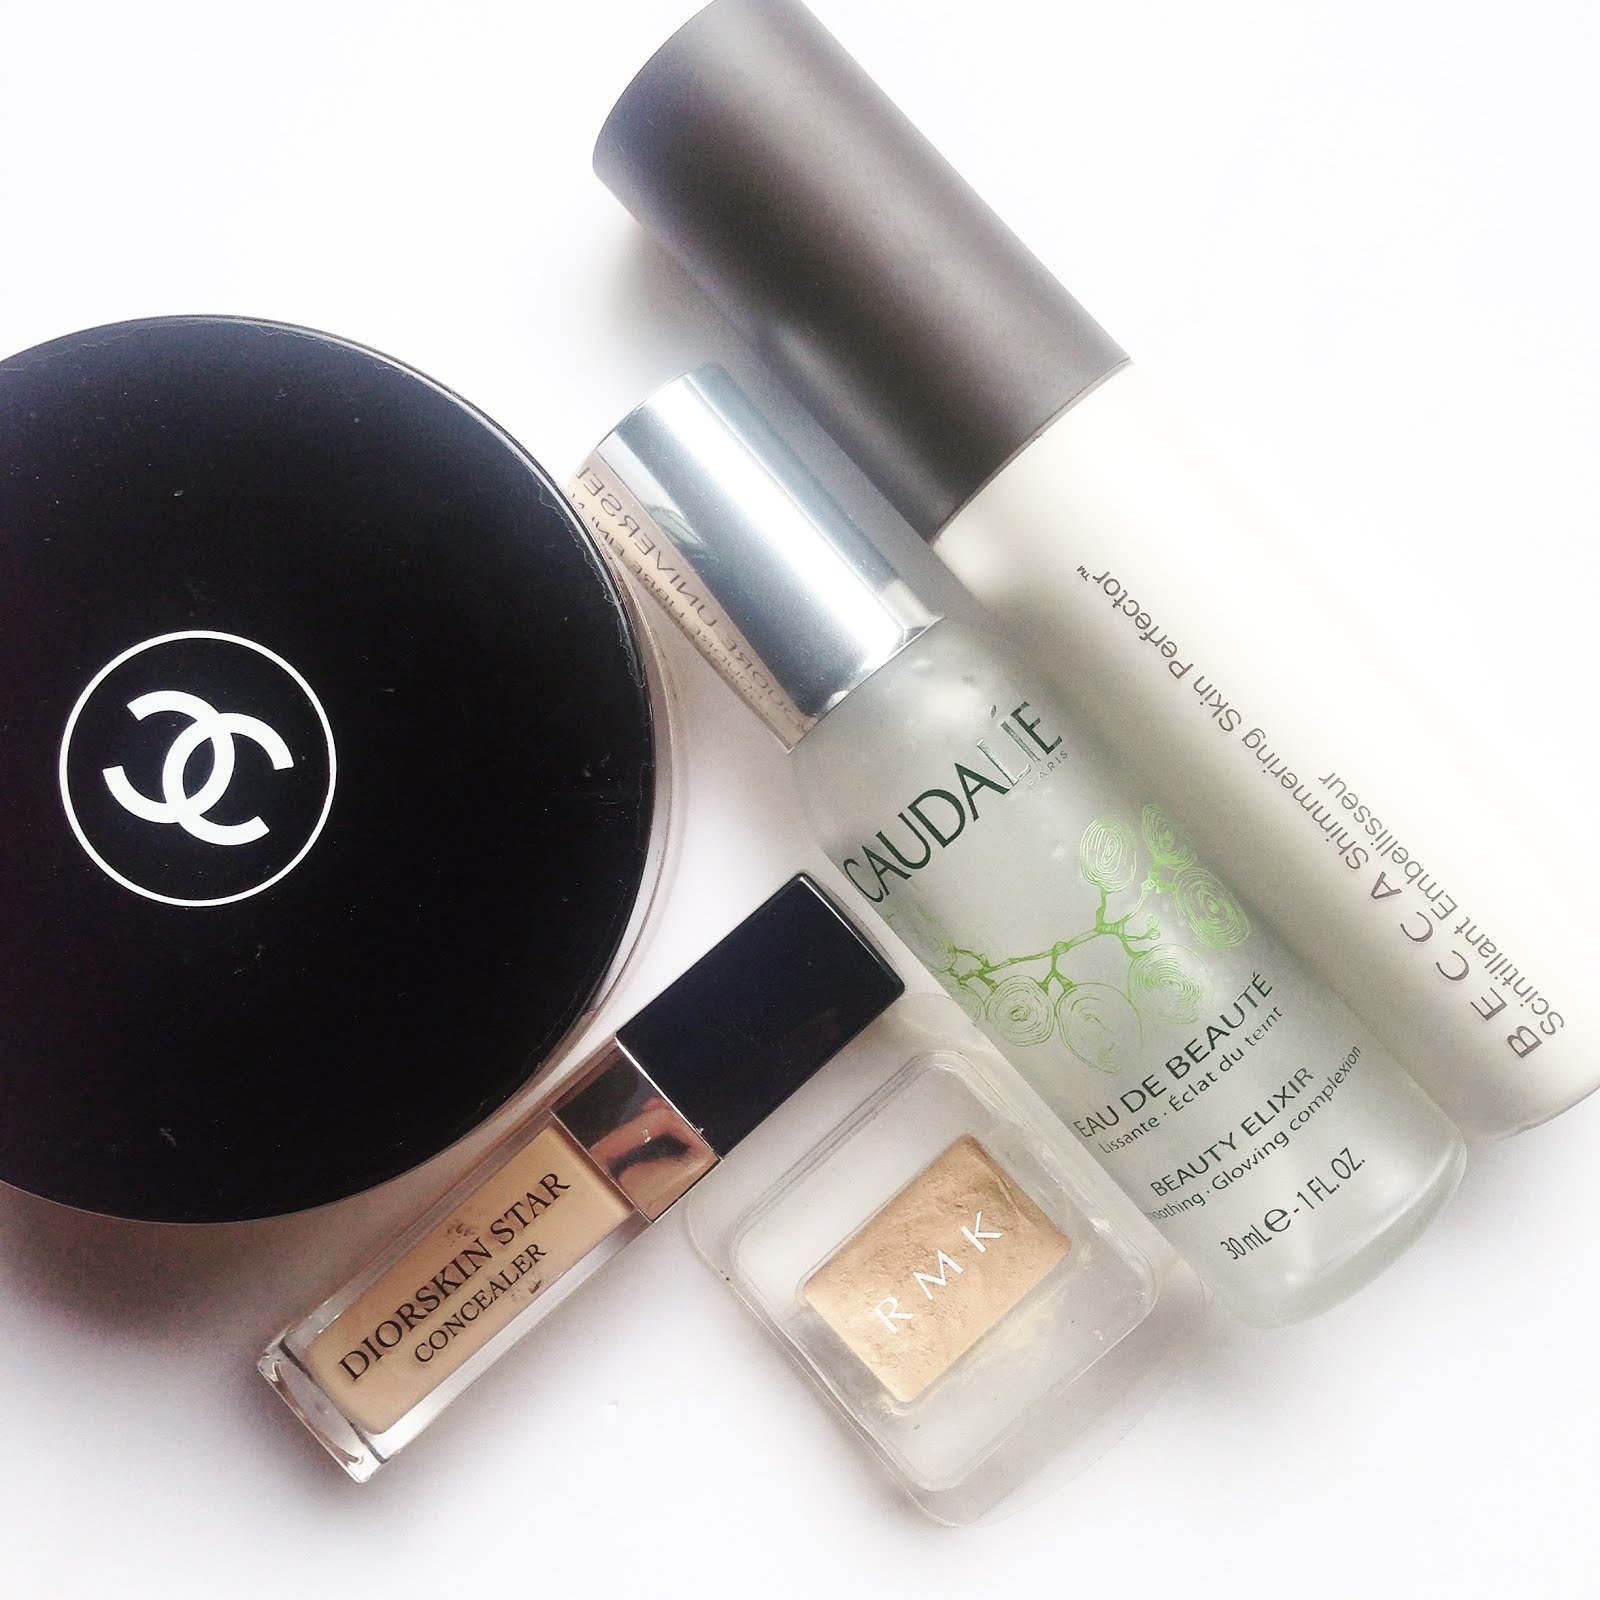
6. Chanel Natural Finish Loose Powder in 20 Clair - Translucent 1

I don't know what's in this that makes the skin look so unbelievably good. My routine isn't complete without a pat of Chanel Loose Powder on my under eye, the nose and the forehead. It has a little somethin' somethin' as it has the slightest bit of coverage (teensy weensy bit tho), just enough to smooth out any uneven skintones on my skin. You know that velvety Chanel skin that you see in their ad? That's exactly what it looks like on my skin. It's not a totally flat matte powder which gives a dulled down appearance, but it just gives the smoothest texture where I need it - especially on the centre of my face which is most texturised (unfortunately). The powder is naturally very finely milled and I use this for baking the under eyes as well. I always find it funny to use the term "baking" because I can't bake for shit in the kitchen hahahahaha. Jeffree Star (whom I adore) applies this with a damp beauty blender, and I think I'll try his way soon enough cause his skin gives me life. Usually I would buff it into the skin or use a velour puff by Laura Mercier.

7. SUQQU Eyebrow Liner Pen in 01 Moss Green 


I feel bad for including this in my list but oh. my. god!! I have always opted for pencils to fill in my brows and follow up with a brow gel, and in my yesteryears I actually used powder to fill in my brows. And the thing about pencils and powders is that, you can see the pencil, and you can see the powder. Just like if you use a powder blush, it'll look far more obvious in comparison to a liquid or cream blush. So. This SUQQU brow pen has an oh-so fine tip brush to disperse the product - which is almost like a watercolour ink. 01 Moss Green is a beautiful shade of dark, ashy grey that looks so freaking natural on my brows. I can't wait to do a full-on review with photos (and possible dupes!!) on the effect that this brow pen gives. It is absolutely unbelievable, just makes my brows look like it has so much density and lots and lots of hair without looking fake and blocky. And I actually fell asleep with my makeup on, and my brows were still intact. Amazeballs. 

8. Kiehl's Ultra Light Daily UV Defense 


You all know what the weather is like in KL right now hahahah. It's super scorching hot! The thing about my usual sunscreens is that it's too thick, even when I do careful thin layers, the texture of sunscreens is just too off. Although heavier creams does help in soothing my easily agitated skin, a lightweight sunblock like this Kiehl's Sunscreen is perfect for those heated afternoons. Because it's ultra lightweight, I know it won't just melt off right away and last for quite a while before I need to reapply. And I do appreciate the size of the bottle as well so I can lug it around with me and reapply whenever I need to. I like that this sunblock have a pleasant scent to it (though it is fragrance-free) and I use this on my nephews and nieces as well because it is not harsh on the skin. It's impossible not to include a sunscreen in my list because I have been harping my friends to get on the sunscreen bandwagon everytime we are walking to lunch. Hahahahahaha sorry guys. I just care about you all.

9. MAC Lip Pencil in Boldly Bare 


If you've read my previous posts, you must know that I'm loyal to my By Terry Perfect Nude Lip Definer. But this is the more reasonable, just as good, go-to lip liner in my collection. MAC Boldly Bare. This lip pencil has a beautiful brightening nude colour whereas the By Terry liner has a tinge of brown and beige. Boldly Bare is a pretty baby pink and counteracts my pigmented lips to perfection. I love to over line my lips with this colour for a fuller look and I get a lot of compliments whenever I use this colour! The texture is a little bit drying in comparison to the By Terry but nothing a lip balm can't fix. Again these two lip liners has been repurchased time and time again because they are both perfection but I will say that Boldly Bare has the upper hand to be on this list because it is simply so damn good. 

10. Diorskin Star Concealer in 02 - Medium 


We have reached the end of the list and we all know that bases are a definite must-have for every girl who loves makeup. Be it primer, foundations, powders or concealer I think bases is what makes any makeup look more perfected. For me, I don't need foundation, I don't need a primer but I need this concealer. Diorskin Star Concealer has made it into my favourites list and now it has upgraded into an essential. This concealer has exceeded expectations in every single way in terms of coverage, texture and blendibility. Make up artist, Morag, has also confessed that this concealer is the perfect quick fix, go-to concealer. It is so simple to use, and just the essence of a Dior makeup - high-quality, beautiful and ultimately a girl's best friend. I use this to cover up any dark spots and brighten up the complexion and this concealer just works wonders. 

And that is it for my current must-haves! I hope you guys had fun snooping into my top shelf and do let me know what are your can't-live-withouts. I always enjoy reading your comments and starting a conversation on my posts. Be sure to read Illiya's must-haves on her Instagram, @illiyaridzuan - and have a happy weekend! Thank you for hanging out! 


Farah x 

Friday 25 March 2016

The Perfect Orange Spring/Summer Lips : Touch In Sol Vivid Lip Crayon in #02 Wild Tangerine


Hi everyone! I've been doing a little bit of makeup shopping recently and this time it is exclusively Korean makeup! So get ready for an array of Korean makeup products to be reviewed and tested on sleepingwithmakeup. I am so thrilled to finally get myself around trying Korean makeup as I gotta be honest with you guys, I stayed away from Korean brands because the marketing and packaging seems gimmicky but I don't think it matters anymore since I have found a lot of gems within Korean brands! I am glad that I did get out of my comfort zone (goodbye Sephora hahaha) because Korean makeup is sooooo fun!!

So, the first lucky product to be reviewed today is Touch in SOL's 1 Sec Vivid Lip Crayon in 02 Wild Tangerine. Touch in SOL is fairly new brand to enter Malaysia, I believe it was launched a month ago at SaSa (or even less). I had the toughest time picking out what I wanted because frankly speaking, I wanted everything! The products that stood out to me on their display was their primers (especially the pore filling primer), the vivid lip crayons and their cushion blushers. I wanted to pick up the pore filling primer as well, which is called the No Problem Primer (geddit lol) but they were out of stock - maybe next time. OK, lets get on to the review!


Price & Packaging

The Vivid Lip Crayons come in a lacquered black tube, and it is a double ended pencil. On one side, you get the actual product, (not a fine nib, but not too gigantic like Clinique Chubby Sticks) and on the other end you get a smudge pen, which is this very spongey point applicator. The Vivid Lip Crayon is a twist-up crayon - do you see those stripes on the smudger end? That's where you twist to get more product. And being a twist-up product, you get a measly 1.8g and this will cost MYR31.70. In comparison to a Revlon Matte Balm, you get 2.7g for the same price (even less) and a Clinique Chubby Stick has 3g worth of products. The cap is a clear acrylic tube and you would know when the cap is secure when you hear a tiny "click" - which is great. Packaging is quite sturdy, weighted and doesn't feel cheap. The box that it comes with has colourful scribbles on it is actually the full colour range offered in the 1 Sec Vivid Lip Crayons. How about the blue one? Yes, they have a blue lip crayon, too!


Colour & Pigmentation

These lip crayons may look fun, but they don't play. The pigments in these crayons are sick! Especially the brighter colours like the oranges, reds, and pinks. I've swatched all the colours in-store,  they are all nice vibrant colours, but I ended up gravitating towards Wild Tangerine #02 more which is a vivid orange shade. This particular shade has a true orange colour and the best thing about these crayons is that you can mix them in with other shades (within the range as well as other brands) and they blend in beautifully. That's what the smudger is for! When swatched, the pigments stay true to colour but once applied to the lips, the colour appears brighter and stronger as my lips are naturally pigmented. If you want to retain the true colour of the lipstick, dab in a bit of concealer to tone down the natural colours of your lips and you'll be good to go. This shade is definitely a more yellow-based orange as opposed to red or coral-based oranges. I actually prefer yellow-based oranges, although it can make your teeth look yellow if you're not careful. Since my lips are naturally more red, it definitely toned down the yellow undertones.

Texture & Application

The texture of the crayon is very slippy, almost feels oily to touch. It does contain a ton of emollients based on the catalogue online, which is sadly in Korean so I can only understand the pictures of papayas, avocados, blueberries and some other fruits that are present in the ingredients. Even though the crayon glides on nicely, it dries down to a powder- so I would say it has a satin matte finish overall. If you add more layers on, of course the glossiness of the lip crayon can be emphasised but after 4 - 5 hours of weartime, the emollients of the lip crayon disappear from your lips but the pigment stays and leaves a stain on your lips. I do have to say that you must exfoliate your lips as it can settle into your fine lines once it set and has dried down to a powdery finish. The application of the lip crayon is an absolute breeze and it wasn't difficult to line my lips with it despite the nib being quite large. The good thing about the crayon is that it doesn't tug on my lips and it is pigmented enough that I don't need to use a lip liner to boost this lip crayon.


(dabbed into bare lips) (that's my cat!! hehe)
(one layer of colour onto bare lips)
(two layers of colour onto bare lips)
(one layer of colour with concealer underneath the lips)
(two layers of colour with concealer underneath the lips)


I think the Touch in Sol 1 Sec Vivid Lip Crayon is a winner for me, particularly this colour as it is the perfect spring/summer lip. I can bring out the colour for a bold look and tone it down as well, for a pastel orange lip. So, Wild Tangerine #02 is such a versatile shade and I have been looking for an orange lipstick that isn't too red, so this is perfect. I don't get why it is called"1 Sec Lip Crayon" but maybe because it glides on so well, that you could do your lips in one second? I don't know about that.. but I would definitely say it is easy to work with. The smudge pen might come in handy when you wanna mix the lip crayon with other shades or when you want to get the Korean trademark gradient lips (anybody want to see a Korean-trend makeup look??). The only thing about this is that the powder finish might cause the product to look a bit patchy when I have dry lips. But the colour is gorgeous!! Let me know what your favourite K-makeup products are and be sure to drop by soon for more Korean makeup talks! Thanks for hanging out x


You can purchase Touch in Sol at SaSa KLCC and selected franchises
or via Guardian Pharmacy here : (Guardian - touch in sol - New cosmetic in town from Korean‎)


Farah x


Makeup Worn in Photo

Moonshot Dark Spot Concealer in 301
Chanel Natural Loose Powder in 02 - Claire
Catrice Sun Glow Matt Bronzer in 020 Deep Bronze
Catrice Defining Blush in 090 Mandy-Rine
The Balm's Mary Lou-Manizer
Burberry Light Glow Natural Blush in Earthy No.07


Thursday 24 March 2016

Game Changer : Peter Thomas Roth's Gentle Foaming Cleanser


I have been around the block with cleansers. I've tried it all. Kiehl's Ultra Facial Cleanser, Shu Uemura Ultim8 Oil Cleanser, Philosophy's Purity, iS Clinical Cleansing Complex, Hada Labo Tamago Cleanser, what else .... Aesop's Parsley Seed Cleanser, what else, what else, I can't seem to recall but yes I've been around the block. They are all good cleansers, in my honest opinion - I've enjoyed using the products, especially Shu Uemura's Oil Cleansers, it smells heavenly. But not one of these cleansers has managed to convince me for a repurchase but one - The Gentle Foaming Cleanser by Peter Thomas Roth.

Peter Thomas Roth touched down Sephora a good 3-4 years ago I should say, and I was never truly interested in their brand since 1. It's very expensive 2. I was complacent with my other skincare brands like Kiehl's and Caudalie. So, back when I ran out of my current cleanser, I can't recall which I was using, I think it was the Purity Cleanser, I got on Paula's Choice Beautypedia and started racking the list for a high-grade cleanser with clean ingredients. And on top of that list, I saw Peter Thomas Roth's Gentle Foaming Cleanser.


Admittedly, even when I got to Sephora, I was so hesitant on purchasing the cleanser because it was so damn expensive but I decided to go for it as I really wanted to test out this cleanser - I even told myself, "I'll keep the receipt in case I want to return it" don't we all do that? Lol. When I got home from Sephora I immediately tested the cleanser out, as it has been a long day out and my mascara was smudged everywhere and guys - I fell in love with it. It took all my makeup off, didn't even need to double cleanse and my skin actually looks brighter after each cleanse. OK. Enough of that long-ass intro (yes that was just an intro hahahaha) and lets get on to the review!

Price & Packaging

You can get Peter Thomas Roth exclusively at Sephora and department stores like Robinsons (The Gardens). This cleanser costs $39 (I seriously forgot how much they are charging in Sephora Malaysia, but my lucky guess is MYR140++). You get 200ml worth of product and I appreciate that it comes in an opaque tube and a nice pump which means that the ingredients will be stable and it is not affected by sunlight. The thing about this cleanser though since it is a foam-based cleanser, the liquid inside does tend to run out of the pump if you're travelling with it and it is not upright, so be careful about lugging it around or packing it in a luggage. It made a mess on my clothes, as the high temperature further increases the liquidity of the product making it runny. Otherwise, the packaging is brilliant and looks borderline clinical from its clean cut container.


Texture & Application

As the name of the product suggested, it is a foam-based cleanser and feels very airy and comfortable on the skin. Since it is sulfate-free, the foam is created by the pump itself where the liquid constituents inside are mixed with air in the foam chamber - but let's not get too techy about it (although I can go on haha). One pump dispenses enough product to cover my whole face, but two pumps is needed if I have heavy eye makeup on (it removes waterproof makeup too!). The directions on the packaging suggests to apply 2 to 3 pumps onto moistened skin - which is actually a pretty accurate instructions, although seriously 1 pump is more than enough. You do not apply this on wet, drenched skin but it actually works better on dry-slightly moistened skin. I wash this off with lukewarm water, and it leaves my skin squeaky clean, but if you want to, you can opt for a muslin cloth for further exfoliation.

Ingredients & Suitability

The ingredient deck on this cleanser is very satisfactory as it is sulfate-free, soap-free, alcohol-free and fragrance-free. This means that it is suitable for my skin, which is very sensitive and dry. Other ingredients include wheat, amino acids, Vitamins A C & E as well as glycerin. After cleansing, my skin feels clean and a little bit taut - but nothing unbearable. The good thing about this cleanser is that it doesn't irritate the skin and it doesn't sting my eye, so the redness in my skin usually around my cheeks are localised and not agitated. This cleanser is suitable for all skin types and I really do think it does its' claims! The cleanser also keeps my skin feeling really fresh and to emphasise that effect, after using lukewarm water to clean the product out, I like to splash my face with cold water.

(post-cleansing bare skin *gasp*)

I think cleansers are one of the things that can immediately change the way your skin looks, and this cleanser deserves its own post because it has changed my skin from being very prone to breakouts into a good condition with minimal break-outs. I am very impressed with how this cleanser reacts with my skin, and I do think its overpriced but nothing else works as well as this cleanser does! It is very gentle, and I use this twice a day (perhaps even more on certain occasions) and it doesn't strip my skin dry. So, if you're on a look-out for a game-changer, drop by the PTR counter and grab this cleanser. It's worth it. If you've found your holy grail cleanser, drop me a comment! I wanna know what it is, and how it changed your skincare game! Stay tuned for this coming posts because I will be talking exclusively on Korean makeup, do follow me on Instagram, @kingfrh, for updates. Thank you for hanging out x 


Farah x

Saturday 19 March 2016

Quilted Eyes


Hi guys! I was really inspired by Chanel's AW16 runway by the grand maestro of makeup, Monsieur Tom Pecheux. He created a beautiful quilted eye look for the runway and it was definitely my favourite AW16 makeup looks (amongst others, will share soon) but I just think that the quilted eye is definitely a wearable makeup for the daily, I'm serious! I will totally wear this on a date night or just chilling having coffee. Maybe I will opt for a more taupey grey shadow to tone down the contrast but otherwise, hell yes to this look. This will be my first attempt of the quilted eyes and because my brush was quite stubby and large, it didn't give much precision as I would have liked. I drew the boxes free-hand and just let my hands guided the shape and pattern and I used the dark brown shade from Urban Decay's Naked 2 Palette (shade code : Busted). Nevertheless, I will update you guys if I have found a better way to achieve this look and secret's out that the Chanel look was achieved using fishnets! Hmmm.. I guess I better get some myself! Thanks for hanging out x


FARAH x

Thursday 17 March 2016

Clean Brushes, Clean Mind


Hi guys, I've just uploaded a post recently in collaboration with Fatimahearts on nude makeup trend (go check it out!!), so today I just wanted to keep it chill and cashhhhh around here and talk about makeup brushes. When I first dabbled into the makeup, the first product I got was Laura Mercier's Foundation Primer and Tinted Moisturiser - hence, no makeup brushes needed. And then it was concealer, translucent powder - again, no brushes needed. But then as I moved up into the more complex side of makeup - doing the eyes, and brows, and cheeks and whatnot, my makeup brushes collection grew with it - and I absolutely had no idea what was the ideal way to wash them. SO. I tried and tested every single way of cleaning them and finally found my most ideal way to keep them clean, bacteria-free, silky soft and in shape at all times. Lets go and get started.

1. Cleanse

There are many brush cleansing solutions out there, so many brush shampoos etc but I essentially cannot vouch for brush cleansers/shampoos because I just think it's a waste of money and unnecessary as the best makeup artists out there don't even bother with using it. I do believe in gently washing the brushes so anything that won't be harsh on your own hair would be great, like baby shampoo. I absolutely love using Caudalie's Gentle Conditioning Shampoo to thoroughly cleanse my brushes as the ingredients in this shampoo is gentle (no sulphates, no parabens, etc etc) and it gets my brushes super clean, too. It forms a lot of lather so I can quickly just rub the bristles at the back of my hands to remove the dirt, and rinse it right off. It does an amazing job with my brushes and doesn't dry it out. Oh, did I mention that it smells absolutely divine? I can't put my finger on the scent tho. But off the bat, it smells like a spa day. I would also mix in a quarter of antibacterial soap to the shampoo and since the shampoo has conditioning properties, it will counteract any harshness from the antibacterial soap. The main thing to consider when cleansing your brushes is not to get the ferrule drenched and focus the cleansing mainly on the bristles. I like to damp my brushes and get the lather going when I'm cleaning it and carefully rinsing the bristles afterwards, and I always rinse the shampoo with warm water to really get the grime out of the brushes.

2. Condition

If there's one thing I like for my brushes is that for it to be super soft. So, I started conditioning them. I just added this to my routine because I have added a few drugstore brands to my collection and did a little experiment to whether a conditioner will make the bristles softer, and it did! I've used the Le Labo Rose 31 Conditioner on my brushes, leave it to soak for 3-5 minutes and then rinse the conditioner with cold water. I like to rinse conditioners with cold water to keep the bristles shiny and soft. Again I just run the tap water through the bristles and use the back of my palms to work the conditioner off the brush. The Le Labo conditioner gives the loveliest rose scent to the brushes and I really feel that I look forward to washing my brushes just from the scent of Rose 31. I know it's hard to get your hands on Le Labo, so I would recommend anything organic or natural like conditioners from Aveda or The Body Shop which has scents that smell amazing as well. Aside from the fact that this conditioner works well with my brushes, I love that the scent just adds to the experience when I paint my face without being too overpowering.

3. Dry

After cleansing and conditioning, I gently squeeze out excess water from the bristles and place my clean brushes on top of a towel (any towel would do) and align all the bristles to form a straight line. Afterwards I fold the towel on top of the brushes and gently press the towel to soak anymore of the excess water. I then carefully shape any misshapen bristles and then place it at a slight angle so that the bristles are not flattened and leave it to dry! Done! And that is basically how I clean my brushes. I do put in an extra step once it's 80% dry by spritzing a little bit of Caudalie's Beauty Elixir to keep the brushes prepped and ready to go.

I store them in a repurposed candle jar, in this case the Diptyque large candle jar as it fits my brushes perfectly (not too short, not too tall). I just love this current routine and I do it once a week or wherever I can physically see that my skin has break-outs which means that my brushes need to be sanitised immediately. I do always clean my eye brushes more frequently just because it's more sanitary that way. Let me know in the comments on your thoughts on brush shampoos/cleansing solutions and how you keep your brushes clean! Thank you for hanging out!


FARAH x

Tuesday 15 March 2016

Going Bare : sleepingwithmakeup x FATIMAHEARTS


Hi everybody, welcome back to my blog! Today is a very exciting day because it is my first blog collaboration and it is with no other than the wonderful fellow Malaysian blogger, FATIMAHEARTS. I am sure all of you are familiar with Fatimah who has been in the blogging scene or so long - she is definitely the OGs Of the beauty scene in Malaysia. If you aren't, head over to her blog and get to know her on FATIMAHEARTS and follow her Instagram account @fatimahearts which I can scroll endlessly when I crave for makeup talks! We actually found each other off Instagram, immediately bonded over the love of makeup and she approached me for a collab! As you can from the title, we will be doing our own looks on the nude makeup trend, so do check her blog out. 

So, what is nude makeup? For me, creating a nude look is customised to our own colouring and undertones. I have my own preference in tones and a certain style on how I do my nude makeup from learning the tones in my medium-fair skin, and what colours work with my hazel eyes. The key to a successful nude, natural makeup is to enhance and emphasise the best features and bring out the colouring of your own face. So without further ado, I will share with you a step by step routine on how I do my everyday nude makeup look. 


Prep

Since I won't be using a bright lip or do a heavy smokey eye, my skin would be the centre of attention hence, skin prep is key. My favourite way to start is by first cleansing my skin with a gentle cleanser, I use Peter Thomas Roth's cleanser (on my second bottle now, it is amazing) then, I follow up with REN Skincare's Flash Rinse 1 Minute Facial (reviewed here) to brighten up the complexion and giving the skin a nice smooth base. After that, I use the iS Clinical Active Serum on any blemishes and massage that in, and I moisturise my skin with REN's Evercalm Global Protection Day Cream which tones down redness + finish with a hydrating sunblock. It's important to lock down a good skincare regime if you want to improve the texture of your skin. Also, make sure your lips are always prepped too. I use Eucerin's Lip Aktiv to keep it hydrated! 

Base 

For base makeup, I dot the Becca Shimmering Skin Perfector in Pearl on any areas that are looking dull/sallow, usually on the inner corners of the eyes and under-eye area and then used my Diorskin Star Concealer in 02 to conceal/highlight underneath the eyes, and leave it to set for  a minute or 2 before blending it out with a damp buffing brush (spritz it with Caudalie's Beauty Elixir, but any other mists would do). I use RMK's Super Basic Concealer in Shade 2 for covering blemishes as it is a waxier concealer which gives fuller coverage, and for this I use a tiny detailer brush to spot-treat any areas. Then I bake my concealer with Chanel's Natural Finish Loose Powder to give the skin a really smooth, even finish. I skip foundation altogether because 1. I don't use foundation in my regular daily routine 2. I feel that letting your own skin show through adds a modern touch to any makeup look. But if you must have a little bit of coverage, try using a foundation with a light texture, like Glossier's Skin Tint (I have a 20% off code! It's here) or mixing in your usual foundation with your moisturiser.


Cheek 

I went crazy on the cheek products since I like to play up my cheekbones (but what cheekbones? hahaha). My nude makeup is more of a bronze-y, sculpted look so I go all out when it comes to the cheeks. First off, I start by defining the cheekbones by taking The Balm's Bahama Mama bronzer which is too grey to be a bronzer, so I re-purposed it as a contour colour, and I apply this with a NARS Ita Brush which is excellent to carve out cheekbones because of how the brush is shaped. I also contour my forehead because why not hahahaha. I then warm up my face with Catrice's Sun Glow Matt Bronzer in 020 Deep Bronze and I mix in the blush from my Inglot palette (blush #28) and Burberry's Earthy No.07 and apply it higher up from where I contoured - the mixture of these two blushes just gives a really lovely mesh of tonal colours against my skin tone. 


Eyes

Because my skin tone is medium-fair, nude colours for me would be taupes, oranges, and greys. So I took the Catrice bronzer and Earthy No.07 mixed together and used it as a crease colour for a natural definition. I then line my upper lash line with Chanel's Rouge Noir, a plummy brown liner which really brings out the hazel tones in my eyes. To add definition, I deepened up the outer corners of the eyes with the taupe shade from my Inglot palette and place an orange shadow to lighten up the centre of the lids. I lined my lower lash line with a white Make Up For Ever Aqua liner blended with a Seventeen Cosmetics blue liner to create a subtle grey but again, you can simply use a gray shadow to get the same effect, I personally used the blue as its undertones bring out hazel/brown eyes. For the brows, I pencilled it in with my Burberry Effortless Eyebrow Definer in Sepia No.02 and set it with the Catrice Eyebrow Filler brow gel, just giving it a little bit of life. Of course, an eye look is never completed without curling the lashes and putting on some mascara, and I used my trusty Chanel Inimitable to give some volume and definition to the lashes. I love mixing in warm and cool-toned colours as the contrast of the bronze warmth on the upper lid and neutral greys on the lower lash just makes the eyes pop, and it looks so interesting. Of course, this look is an all-matte look to keep it nude and not overly done. 

Lips

I only have By Terry's Perfect Nude lip liner and M.A.C's Yash on the lips as it is my go-to combo of the moment. I just love the two colours together and again, adds more warmth to my otherwise dull/sallow face. I love using lip liner as a base for my lipsticks and the By Terry's Perfect Nude is my go-to colour, I think this is my second or third pencil. I stumbled across a video recently of Lisa Eldridge using this liner and she mentioned that it is discontinued (say it ain't so!!) but point is she said Make Up For Ever's lip liner in 2C is a perfect, cheaper alternative. I noticed that I suit warmer nudes rather than mauves because my lips are so pigmented (almost grey on the edges) and it needs the warm yellow undertones of the lip colour to combat any grey-ness. So, when you are trying to look for a lip colour, try to look for something that would suit your natural lip colour, too. 


Hairstyle #1 : Messy Dutch Braids 


Hairstyle #2 : Faux Bob, tucked into jacket

And this is the finished look! A sculpted, bronzey nude makeup with taupey grey-toned accent on the eyes. I usually wear this makeup on the daily, and switch up the lower lash colours frequently. Sometimes I do a pink berry, a turquoise, browns, greens - whatever that tickles my fancy. A nude makeup look doesn't have to consist of just using "nude" tones or shying away from colours and sculpting/bronzing your face. When done right, colours and accents can actually emphasise your own features and brighten up the face while still maintaining a minimalist, nude aesthetic. I love to focus on the skin and change up my hair when I'm rocking a nude face. Hairstyle #1 comes in really handy when it's super hot and I want my hair out of my face, and hairstyle #2 is my go-to look for a rainy day so that my hair doesn't frizz up. Thank you Fatimah for the this and I had so much fun drafting this out! Do check out FATIMAHEARTS' take on the nude makeup trend over on her blog, theleakycauldron-fatma.blogspot.my. I hope you guys learnt a thing or two from our routines and share with me what your go-to tricks are and which features do you like to emphasise when you do your makeup! Thank you for hanging out! 


FARAH x 


Full Product List -

Base

Peter Thomas Roth Gentle Foaming Cleanser
REN Skincare 1 Minute Facial Flash Radiance (swatches and review here)
iS Clinical Active Serum 
REN Skincare Evercalm Global Protection Day Cream
Eucerin Lip Aktiv 
Becca Shimmering Skin Perfector in Pearl (swatches and review here)
Diorskin Star Concealer in 02
RMK Super Basic Concealer in 02
Chanel Natural Finish Loose Powder in 20 Clair 

Cheek

The Balm's Bahama Mama Bronzing Poudre 
Catrice Sun Glow Matt Bronzer in 020 Deep Bronze  (swatches and review here)
Burberry Light Glow Natural Blush in Earthy Blush No.07  (swatches and review here)
Inglot Freedom System Blush #28 (swatches and review here)

Eyes

Inglot Freedom System Eyeshadow M #342 #312 (swatches and review here)
Make Up For Ever Crayon Kohl in 2K
Seventeen Crayon Kohl in F127
Chanel Inimitable Mascara in Noir 
Burberry Effortless Eyebrow Definer in Sepia No.02  (swatches and review here)
Catrice Eyebrow Filler in Brown (swatches and review here)

Lips 

By Terry Perfect Lip Liner in 1 Perfect Nude (swatches and review here)
M.A.C. Matte Lipstick in Yash (swatches and review here)


Saturday 12 March 2016

Should You Bother? Becca Shimmering Skin Perfector in Pearl


Before Sephora was sephora.my, I was on the waiting list for Becca's Shimmering Skin Perfector in Pearl.... for a year. Luxola was notorious for having half of their store out of stock, so it was a frustrating and painstakingly long process to get my hands on this Lisa Eldridge favourite, who was one of the many makeup artists I turn to for (online) advice. Finally on the 1st of February, it was available on sephora.my so I added the goddamn thing into my cart and never looked back. Becca was a brand known for giving the skin a perfected glow - they do it in all sorts of textures too. Liquids, creams, poured, pressed powders - you name it. I wasn't really interested in powders or cream highlighters due to their lack of versatility in comparison to liquids, which you can mix in with bases and moisturisers easily, so my impulse shopping urges were totally held back when I was browsing on Becca's page hahaha. 


Price & Packaging

It comes in a clear, flat matte tube (which is funny cause it is a shimmering highlighter) (is this an inside joke Becca) (oh the irony) (I'm easily amused) . The packaging feels so satisfying to the touch, it's hard to explain but the matte texture does something to me. Design features of makeup products just gets to me and I can't help wanting things just for their packaging #architectproblems. May I just chime in with the fact that the plastic lid cover broke. I think it may be because of my own doing of lugging this in my schoolbag where I go hahaha. But it broke on the edges so now the lid comes off easily. I don't know whether the packaging is not sturdy or I'm just too rough with it. Anyway. Becca Shimmering Skin Perfector retails for MYR189.00 with 15ml worth of product, which I can conveniently see how much product I've used up through the clear tube. Isn't it ridiculously expensive? I died on the inside when I pressed the Add to Cart button.. Although 15ml is a lot but still, it doesn't quite justify the price because do I really need 15ml worth of highlight


Texture & Application

The one thing that can make or break a product is the texture. What makes it to my top shelf (especially skincare products) will always be something that has top-notch skincare ingredients, hydrates and protects my skin, doesn't break me out AND on top of that, has a bomb-ass texture. I know, I am so not fussy hahaha. Becca Shimmering Skin Perfector is more creamy in consistency rather than liquidy and runny. This allows for a precise placement on the high points of the face as it won't get where it's not supposed to and be super messy. One thing though, a full pump (shown in photo) gets too much product out, so be careful not to waste. Also, it can be too thick of a texture when you're all sweaty and bothered so I don't recommend to apply all over the face unless you'll be staying indoors or going out at night, or have normal-dry skin. For me personally, I like the texture because I have really dry and sensitive skin so the extra moisture is a plus.

I prefer applying this with my fingers dotting on the products at the highest points of my face and blending it out towards the edges so there are no distinct line to where I've placed the highlight. I also mix this in with my current body moisturiser by PRTY PEASHUN and it just gives me a really nice luminous glow and extra hydration which feels really comfortable. I generally would use this after priming my skin and before concealing, I add just a dot underneath the eyes to brighten it up pre-concealer and it gives me a boost of light to combat my dark circles. Texture-wise, it's liquidy enough to mix with other bases without changing the colour/consistency of the product I mix it with, and creamy enough to give me control in application


(L : before, R : after) 

Colour, Pigmentation & Finish

Pearl is a pure white shimmering cream which just gives my skin an ethereal glow. Whenever I use this, my skin looks so much brighter, more even-toned and I get a lot of compliments, too! Under a spotlight or any kind of direct lighting, Aiman notices that my skin is shimmering and is brighter, as per quote "your skin looks like a mermaid that just got out of the ocean" hahahahaha. That can be a good thing or a bad thing cause whenever I use this, I do notice that the back of my hands (usually where I pump out the product before applying it to the face) it becomes very shimmery when it hits any direct lighting and has an extra sheen. Personally, I love it. But too much shimmer might not be everybody's cup of tea. It photographs really well and the micro-pearls in the liquid reflects light and makes my skin appear brighter (how many times do I need to use this word). It doesn't give you the in-your-face-highlight effect a powder or cream highlight could give, but I very much am happy with the subtle luminosity it gives. I do have other more intense highlight for those special occasions but Becca Shimmering Skin Perfector in Pearl is my every day go to for a fresh-faced look. 


day-time lighting, direct sun

This photo above is Becca Shimmering Skin Perfector placed on the inner corners of the eyes, under the brow bones, on top of the brow bone, onto the cheekbones, the cupid's bow, bridge of the nose and in between my brows (ummm well, I'm basically bathing my face with highlight lol). I've also placed the product underneath my eyes and top it off with a concealer. Again, despite the ridiculous amount of areas I've covered, it is very subtle and just gives a healthy glow and moisture to my other-wise dry skin. Also, I only need half a pump to cover those areas, probably even lesser. For day-time looks, I've kept the rest of my makeup pretty minimal (I mean, it looks minimal hahaha).


evening, around 5-ish, direct sun

Then for the evening-time, I've amped up the makeup by smudging my favourite Chanel kohl on the eyes (reviewed here), added a little bit more Earthy No.07 onto the perimeters of my face and topped it off with the highlight again. Here, you can see how well the photo picks up the glow from the highlight, especially in the inner corners and on the cupid's bow. Do I think is a good product? It's an excellent product. Do I think you need it? Becca Shimmering Skin Perfectors is just one of those things that you didn't realise you needed until you actually have it. I do think it changes the way my skin looks, but I highly think it's more of an extra step as opposed to being a necessity. What should be a necessity is making sure you have a bomb-ass skincare routine, enough water in a day, some form of exercise (30 mins per day is more than enough), and a healthy diet (I suck at this though hahaha). After that, we can be hot and bothered with this highlight.


x FARAH